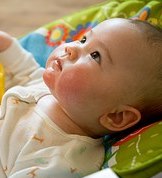
Young children are bundles of hope and joy in any home. A child starts becoming lively just when teething starts and they are able to murmur a few words. That said, when does a baby start teething?Teething for most babies usually starts between four and seven months. It is during this time that your cute little bundle of joy will turn on the cranky side, becoming all fussy and clingy as well as highly irritable. The change is with good reason as teething comes with a lot of discomfort and pain.
Most parents will usually find themselves heading to the store to try to get something that will help make the teething experience a little more bearable to the baby. The number of teething products is quite overwhelming, and picking the right one might be a bit of a challenge. Below are some of the best types of toys that will be both safe and effective.
Chill toys
These refer to toys that are designed to be chilled before giving the baby. They are usually made from plastic or rubber. The cold temperatures will help in alleviating any pain and discomfort while soothing the swollen gums. The toys will remain flexible even in the cold temperatures, for the baby to enjoy the chewing action. It is advisable to avoid gel or liquid-filled teething toys when selecting. Remember that chilling should not be done to freezing temperatures.
Mesh feeders
You can opt for a mesh feeder as the teething toy, but only if your baby six months of age or older. Mesh feeder is a small mesh bag with a sturdy ring attached to it. You can pop a delight into the bag, such as chilled banana or strawberries, close the bag, and give it to the baby to enjoy. The mesh will ensure that only safe amounts of pulp and flavor make it through, while soothing the gums in the process. Feeding and soothing are both taken care of at the same time.
 Teething Blanket
The teething blankets are a comfort item, which doubles up as a teething toy. They have a soft body but the caps are rubberized on the corners, allowing the baby to hug and chew at the same time. They have varying textures that the baby can enjoy exploring.
Vibrating toys
The vibrating toys are among the newest teething toys in the market. They take advantage of the fact that a little vibration can have soothing effects on the sore gum of the baby. The vibrating toys have rubber or silicon exterior and they will only vibrate when the baby clamps down on it from the exterior.…


 3. The electronics.